This week I added support for tile maps, so levels can be created with the LDTK editor.
Tilemaps
The core idea of tilemaps is that if you design some square images which neatly fit next to each other, you can stick them together to make a much bigger image that looks like a coherent whole.
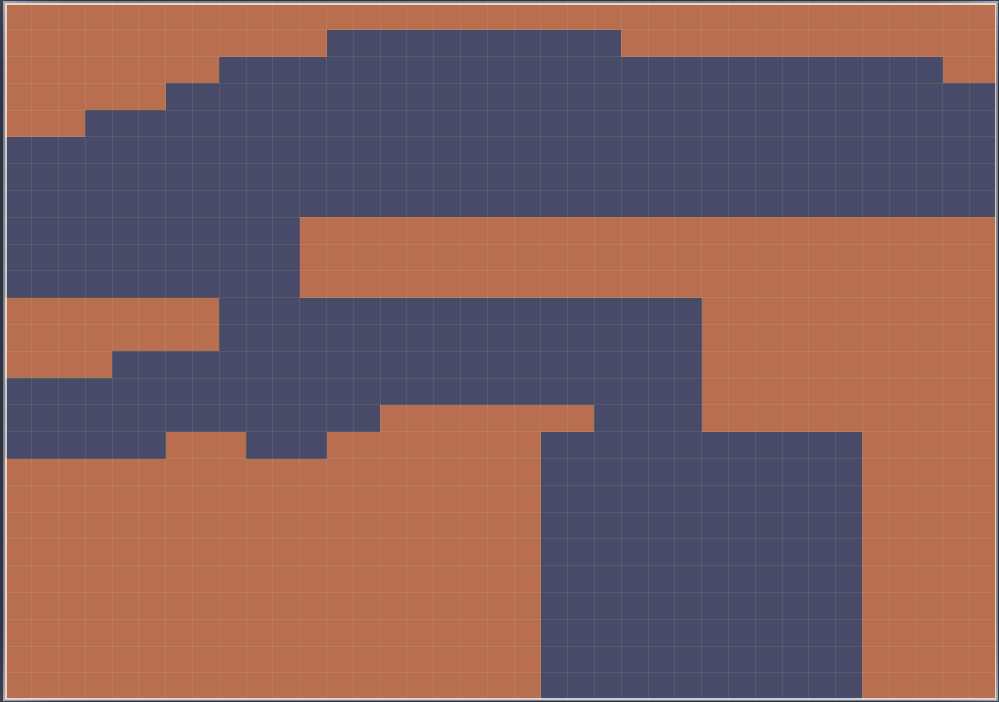
Here's a quick1 example; say you've decided that you want your level design to look like this:
Then you can take a bunch of tiles packed into one image like this:
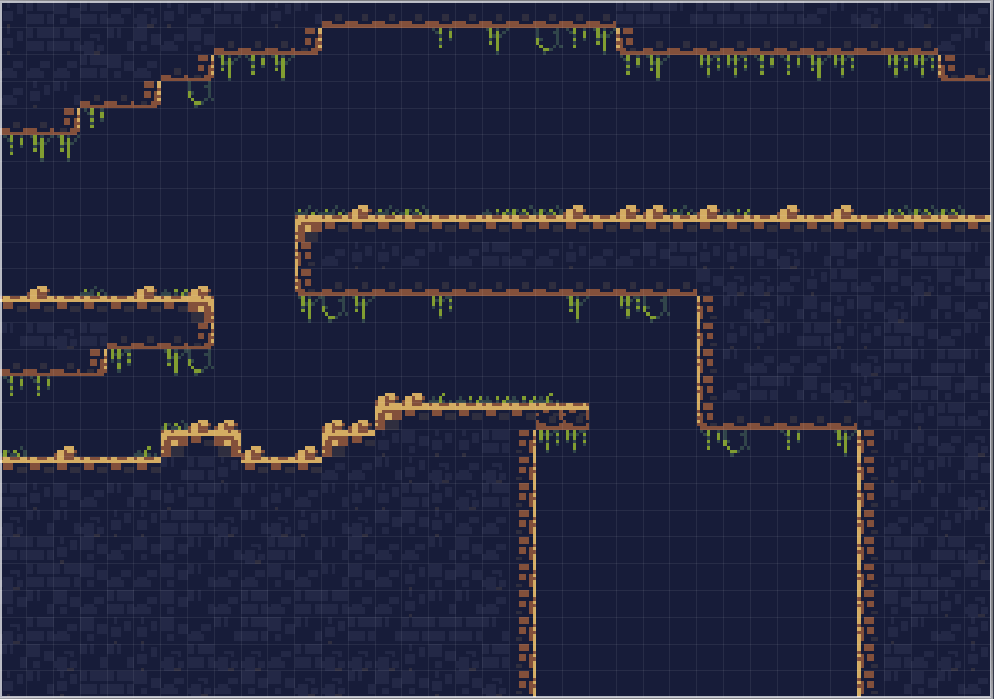
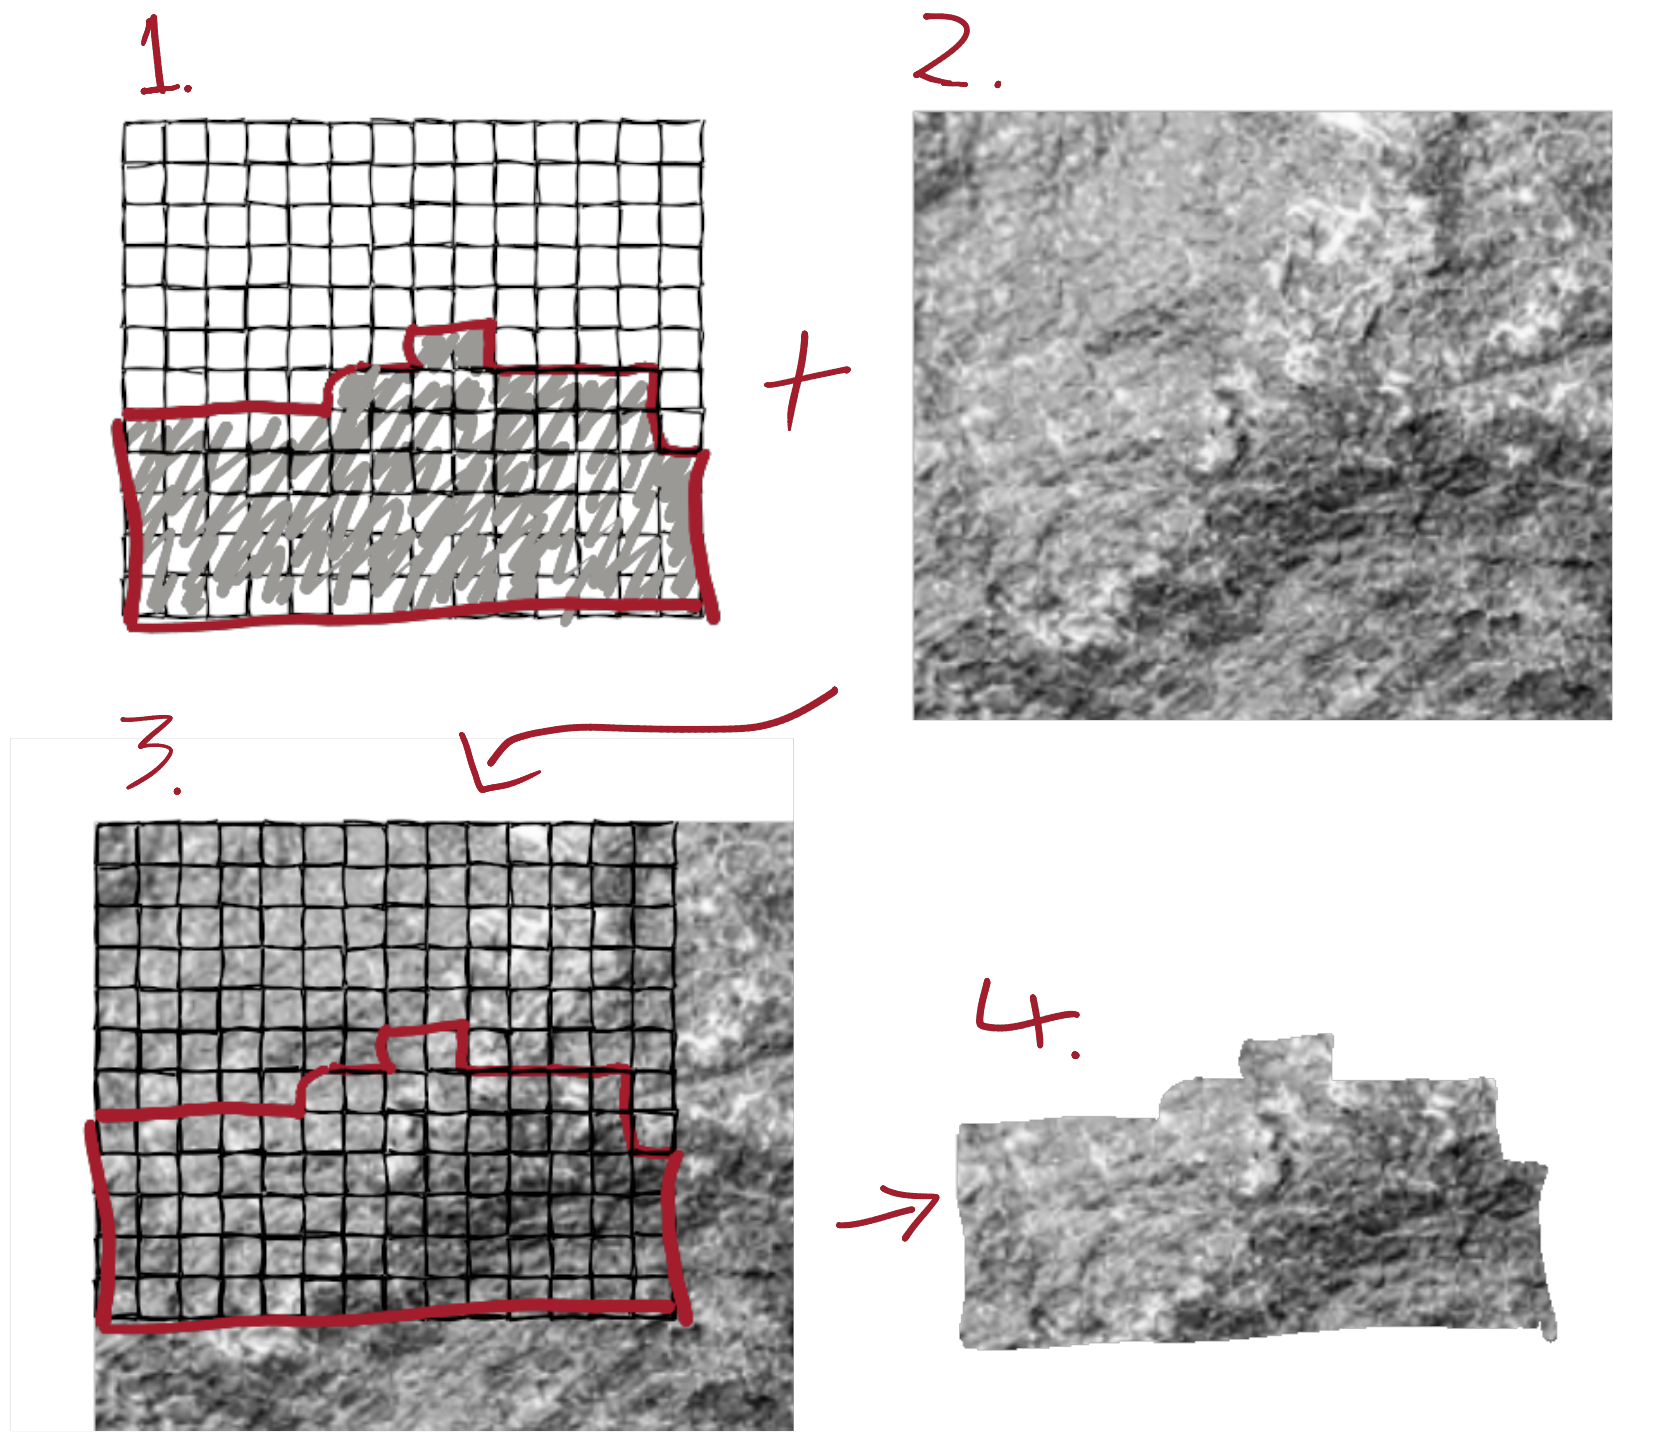
And stick those tiles together to get exactly your original level shape:
Now you have a much nicer looking level, and you only had to draw a few2 tiles.
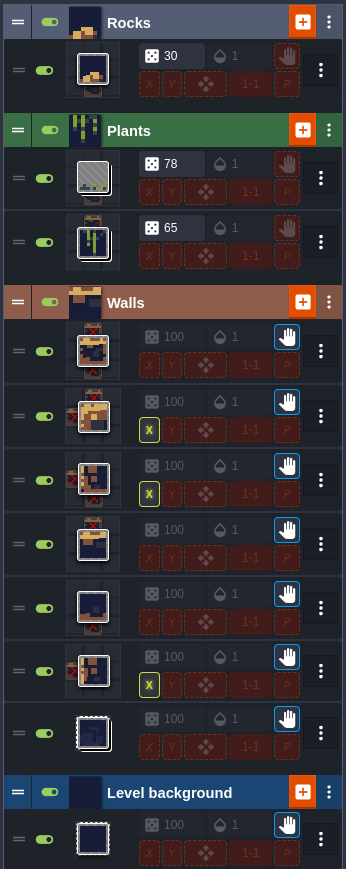
Of course, placing each of those tiles by hand would be tedious, so you can define "auto-tiling rules" that automatically place the right tiles, based on which tiles are around:
Tilemap Tradeoffs
On the one hand, designing levels using tilemaps in this game is pretty obviously a good fit: currently every piece of a starting level looks a lot like that LDTK intgrid example above.
On the other hand...
- Right now we can draw rectangles of arbitrary sizes; a tile-based system means limiting ourselves to multiples of (at least) 8px. That means less flexibility.
- For example, a pile of sand would have to be drawn as a block of sand, which would then fall into a mound shape.
- Moving bodies don't fit nicely; they would have to be placed in the LDTK editor as a "create body from shape X here when the level is loaded" marker, and I'd have to reload the level to see if the body fits properly.
- We can't have an in-game level editor (for players to use to make custom levels) unless we reimplement the auto-tiling logic.
- That also means that I can't easily see design guides when editing levels, like "players can jump this high".
A more flexible graphical approach would be to have a really big image for each type of atom, and "cut out" the appropriate bit of the texture: 3
That seemed like a potentially prettier outcome, but to make it look good you still have to figure out what to do at the "borders" (transitions between different types of atoms) - and that seems like it'd be either back to auto-tiling again, or require an even more complicated approach. So it didn't seem worth going down that route for now.
Overall, A+ level editing is secondary to "it's about time to start building some actual gameplay", so I decided the tradeoffs of using tiles and LDTK are acceptable - at least for now. 4
Tilemaps in Action
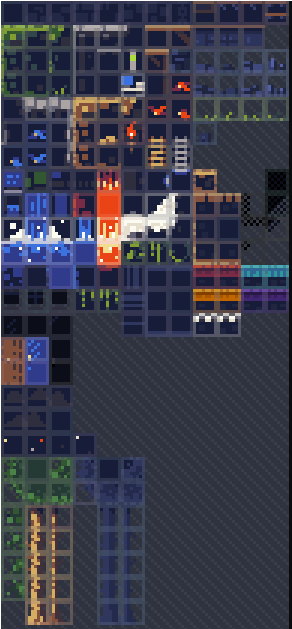
I made the world's most basic tilemap in Aseprite and got the approach working:
Internally, everything runs just as it did before, except each atom just has a different starting color:
- The LDTK file says what atom type should be created in each 8x8 cell, and also what tile should be there.
- We load the correct tile image from the Aseprite image file.
- We create a bunch of atoms and look up each atom's starting color from the tile image.
- If there is no tile, we just generate a color as before. 5
I also went a little out of my way to make level hot-reloading work; if either the Aseprite image file or the LDTK level file are updated, the level will automatically reload to show the changes: 6
Playable web build
Here, see that beautiful stone tileset in action:
Only levels starting with main: (all 2 of them!) are LDTK-based levels, so only they use the stone tileset:
NB:
- The stone tileset is incomplete, so you might (now or in future) find some odd cases where the border doesn't line up quite right. I'll get to that, but it's not super important right now.
- There's a bit more separation between "editing mode" and "playing mode" now. While in editing mode (press F4 to toggle), you can move the camera with WASD or arrow keys - but player input will be ignored.
- Known bug: it's possible to get your player character slightly embedded in the floor on the starting level. If you can work out how/why,7 you get a cookie.
For an excellent extended example, I recommend this breakdown of Celeste's tilemapping.
Only 22 tiles, in fact. All the other tiles in the example are unused here.
This cut-out approach seems to be how the Worms series textures their levels. And Factorio uses it for concrete too.
Also I figure I can work around some of the issues. For example, to allow tiles to be e.g. 4x wide, I could make make the outer 2 pixels on each side of an 8px tile be transparent, and then when reading the saved level from LDTK into the game, just ignore those transparent pixels; that would let me move along.
I kept support for non-LDTK levels too, so those also use the generated colors still.
Unfortunately, this approach of assigning colors to atoms at the start does mean that the whole level gets reset even when only the image file is updated: some atoms change their color over time, so even if we kept track of where atoms have moved to, it might be incorrect to change their color.
Hint: use the debug menu (F2) and re-read the bit about repairing the slow physics bridge in Let Sleeping Atoms Lie.